Shedding a New Light on the Universe
Using an Overhead Projecter to Project a Spectrum
We have not tried this recently, however if overhead projecters are still available, we can say that we have had very good success with using them to generate a good, large spectrum. This idea was originally published by Dr. Philip M. Sadler in the article "Projecting Spectra for Classroom Investigations," The Physics Teacher, 29(7), 1991, pp. 423-427.
You will need:
- an overhead projector and a source of power
- two or three books or pieces of 8x10 dark construction paper
- diffraction grating - (a film with thousands of microscopic grooves per inch that break up white light) - available from science supply companies such as Edmund Scientific and Learning Technologies, Inc.
- white wall or screen
|
1) To make a visible light spectrum, plug in the projector, and turn on the lamp. Set up the projector so it is projecting at a white screen or wall. |
2) Use books on the base plate of the projector to completely block all but a single slit of light no larger than an 1" wide from being projected on the screen. Focus the projector. |
|
|
|
3) Place a diffraction grating over the lens at the top of the "projection stack". Rotate the grating (if necessary) until the spectrum appears on both sides of the projected slit on the wall or screen. |
4) Turn off the lights, lower blinds, whatever you can do to make the room dark. You should now have a nice spectrum projected onto the screen/wall. |
|
|
Other Things to Try
Using a Slide Projector
|
You will need:
| 
|
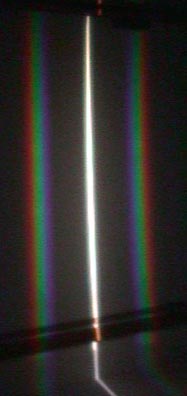
Plug in a slide projector, turn on the lamp. Place the slit slide into the slide projector so that the slit makes a white vertical line on the screen or wall. Focus the projector. Now, place the diffraction grating slide over the front of the lens. (You may need to rotate the diffraction grating slide to get the spectrum on the wall, rather than the ceiling or the floor.) The visible spectrum will appear on both sides of the white line on the screen or wall. You may wish to move the projector so that one part of the spectrum appears on the screen or the wall. Note: This works best in a very dark room.
Using a Prism
|
The diagram to the right shows what angle to project white light into a prism in order for it to split the light into the band colors of the spectrum. If you are not using sunlight, you might try purchasing a "full-spectrum" lightbulb at either a health food store or a hardware store (they are sometimes used for people with Seasonal Affective Disorder). These types of light bulbs may work better than a halogen lightbulb.
|
|
|
To the left is how Zeilik and Gaustad suggest for the projection of a spectrum. "Use a slotted piece of cardboard to pass a beam of sunlight through a prism. Let the light coming out of the prism fall on a white sheet."
|
|
The "Universe at Your Fingertips" publication put out by the Astronomy Society of the Pacific does not use slotted cardboard for the setup for Herschel's experiment. It notes that if you are trying to duplicated Ritter's experiment to detect ultraviolet light, that the sunlight should be from an open window as glass blocks most UV radiation. The setup for Herschel's experiment is shown on the right.
|
|